Some Useful Tips for Monsoon Skincare

Some Useful Tips for Monsoon Skincare


I know this is a food blog! But as much as I love food, I also like to take care of my skin, hair & health. So, you will read lot of stuff related to these things too on TGS! And finally, it has started pouring in Delhi, reliving us from the scorching heat of summers! But I am not sure how long I will get to enjoy this beautiful weather, as Delhi & rains are not really that compatible. So, quickly sharing some tips on Skincare for this monsoon!

Monsoons are arriving! With every downpour, your spirits are revived. Your skin, however, does not experience the same enthusiasm and instead suffers from oiliness or dehydration brought on by monsoon. This is the time when the skin becomes irritable due to humidity and rashes caused due to season change, give way to other skin problems.

Rains can be pretty harsh on your skin. You may be surprised that your skin, which looked radiant throughout summers, suddenly looks clammy during rains. Here are five tips and products to protect you from the damages caused by weather-change:

1.       Use a Moisturizer-cum-sunscreen: Your skin behaves differently in monsoon, it becomes important to take special care of it. While everything around you is bright and beautiful, the increasing humidity does not allow your skin to breathe properly making it appear dry.Smooth on a moisturizing body lotion that contains sunscreen in proper concentration. The body lotion is not only supposed to protect your skin from drying but also saves it from tanning. Vaseline Healthy White is a moisturizer that contains SPF 25 to prevent your skin from tanning and also makes is 4 times fairer instantly.
2.       Cleanse the skin: The skin should be cleaned 3-4 times a day with non-soapy options. This helps to clean excessive oil and dirt from the skin pores and helps it breathe. Cleansing also keeps blackheads and whiteheads away.
3.       Say No to Frizz: While umbrellas prevent your hair from getting wet, the moist and wind make your hair frizzy. To avoid your hair from becoming this annoying frizz covering it with fashionable yet protective scarves. Additionally, wash hair a little more frequently than you usually do in the monsoon as all the humidity and sweat causes it to get dirty soon and attract dust and pollution.                                                                                                
4.       Hydrate yourself: Drink at least 7-8 glasses of water to maintain skin hydration, as the skin loses a lot of water due to exertion in the rains .
5.       Avoid fungal infections: Fungal infections are the most common complaints of the rainy season. Never keep your skin wet for a long time. Bathing with lukewarm water and using antifungal creams, soaps and talc will prove to be effective in combating fungal invasion. Some of these common infections are athlete’s foot, ringworm, or itching caused by wet damp clothing. What works best is petroleum jelly that heals your skin from various such infections.

Disclaimer: I do not claim to own this image: source 

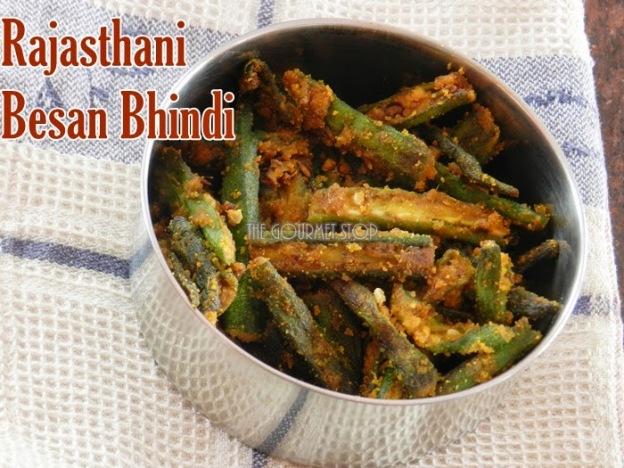
Rajasthani Besan Wali Bhindi Recipe: A perfect recipe for Lunch Tiffin!

Rajasthani Besan Wali Bhindi Recipe: A perfect recipe for Lunch Tiffin!

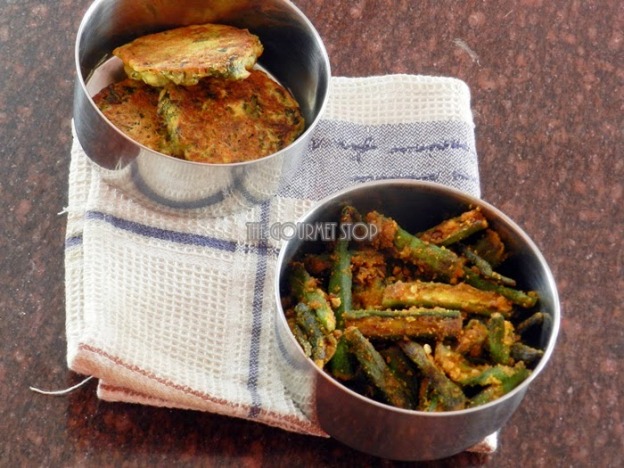
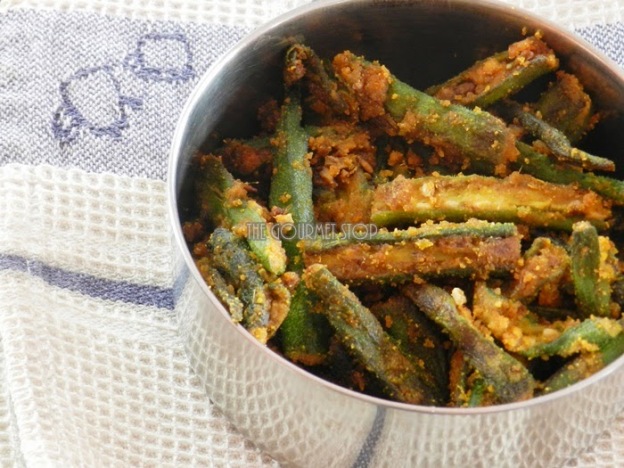
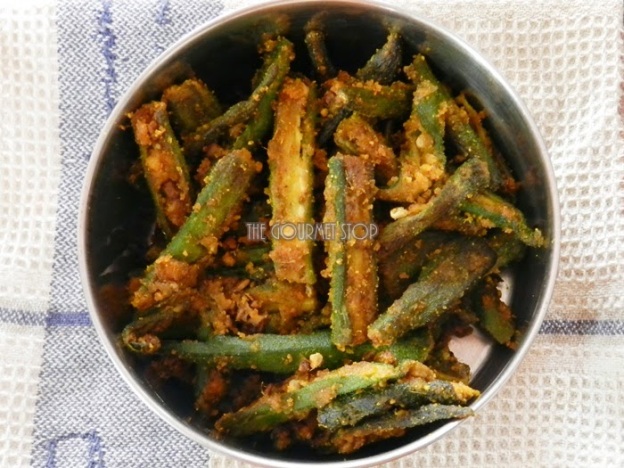
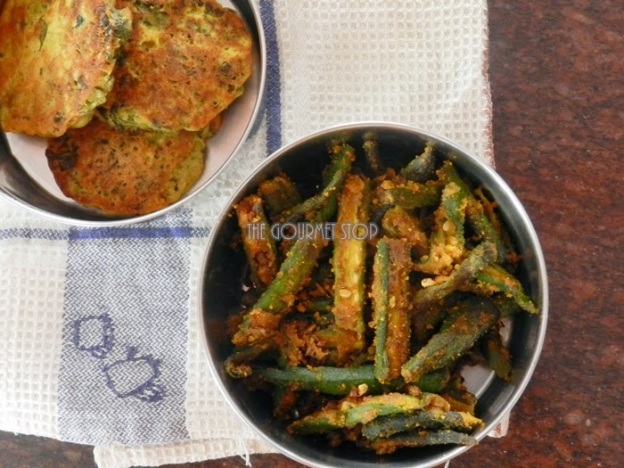
Every morning I struggle, thinking what I should pack ‘different’ for my husband’s lunch time tiffin. Though I normally prefer making everyday roti & sabzi but it gets boring & repetitive week after week. So, I have started tweaking those everyday sabzi & try to make it in different variations. Now, Bhindi/Okra/Lady Fingers are so so common in Indian households and I am sure you make Bhindi ki sabzi atleast once or twice in a week. Here is a quick & different version of Bhindi ki sabzi, inspired by my visit to Rajasthan in 2010 – ‘Rajasthani Besanwali Bhindi’! What I observed is that you will find extensive use of Besan/Chickpea/Gram Flour in their cuisine which is very unique. It was loved by everyone in my home & I did receive quite a lot of compliments too. It is a perfect sabzi to make in the morning when you have thousand of things to do!

Rajasthani Besan Wali Bhindi Recipe: A perfect recipe for Lunch Tiffin!

Rajasthani Besan Wali Bhindi Recipe: A perfect recipe for Lunch Tiffin!

Rajasthani Besan Wali Bhindi Recipe: A perfect recipe for Lunch Tiffin!

Rajasthani Besan Wali Bhindi Recipe: A perfect recipe for Lunch Tiffin!

PS: Do you see a kabab like thing in pictures, that I made for tiffin? It’s made from leftover Sindhi Sai Bhaji, I will share recipe for that soon!

Click “Print” or “PDF” button below to save this recipe!

You will need:

250gm Bhindi/Lady Fingers/Okra – Slit in half length wise
1/4 Cup Gram Flour/Chickpea Flour/Besan
1/4 Tsp Turmeric Powder
1 Tsp Coriander Powder
1 Tsp Red Chilli Powder
1/2 Tsp Fennel Seeds/Saunf Powder
1/2 Tsp Cumin Seeds/Jeera Powder
1/2 Tsp Dry Mango/Amchur Powder
1/4 Tsp Asafoetida/Hing
1 -2 Tbsp Water to sprinkle
Salt to taste

Serving: 2-3 Persons

Steps to Make Rajasthani Besanwali Bhindi:

  1. In a pan add oil & allow it to heat. Add cumin seeds & let it flutter.
  2. Add asafoetida followed by Lady Finger/Bhindi/Okra – slit in half lengthwise.
  3. Mix well. Let is cook on medium flame for 2-3 minutes. Give it a stir after 2-3 mins & let it cook again.
  4. Add salt to taste, turmeric powder & mix.
  5. Cook bhindi fot 8-9 minutes, stirring occasionally, till it gets a little crispier on medium flame.
  6. Once the oil separates, add besan/chickpea flour/gram flour, coriander powder, Red Chilli Powder, Sauf Powder, Jeera Powder, & Dry Mango Powder. Mix everything well.
  7. Cover with lid & let it cook for 3-4 minutes on low flame.
  8. Open the lid after 3-4 minutes, sprinkle some water if required, so it doesn’t stick to the pan.
  9. Mix & give it another 2-3 minutes, then turn off the gas.
  10. It’s ready to be served.

If you want to see how I made this Rajasthani Besanwali Bhindi,then head over to video recipe by clicking this link:


Click “Print” or “PDF” button below if you want to save this recipe!

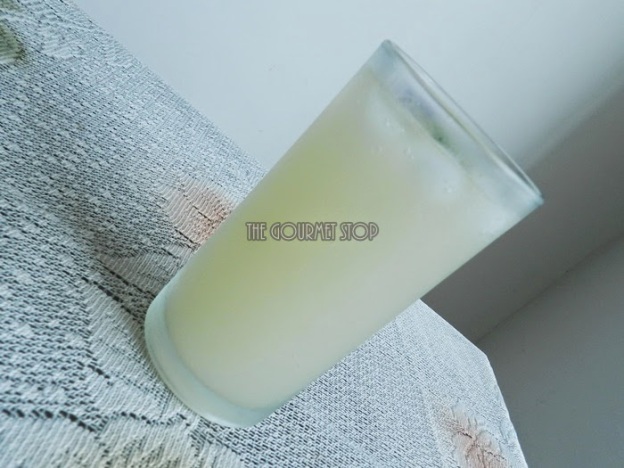
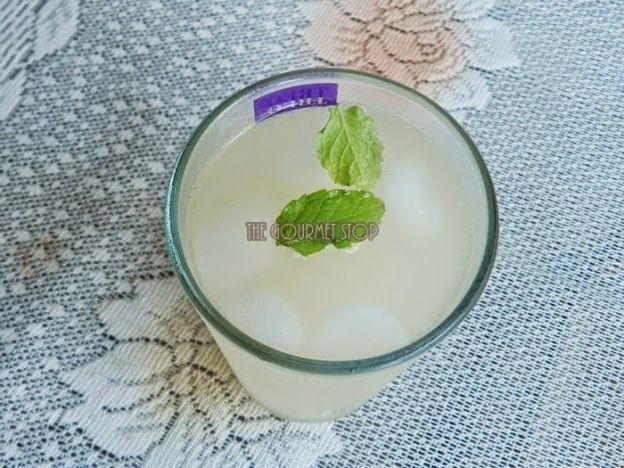
Sweet Lime Soda With a Twist of Ginger & Mint Recipe

Sweet Lime Soda With a Twist of Ginger & Mint Recipe

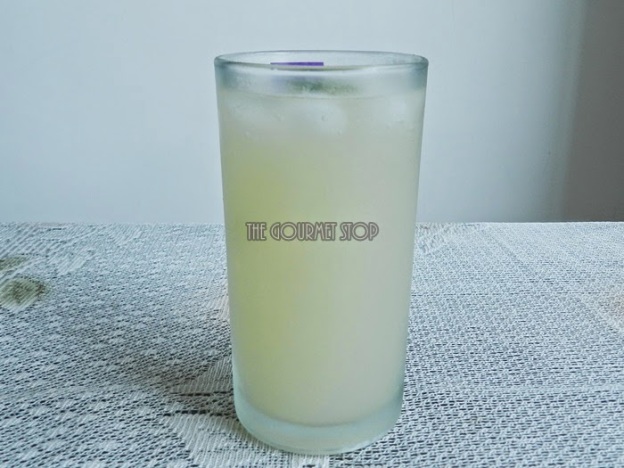
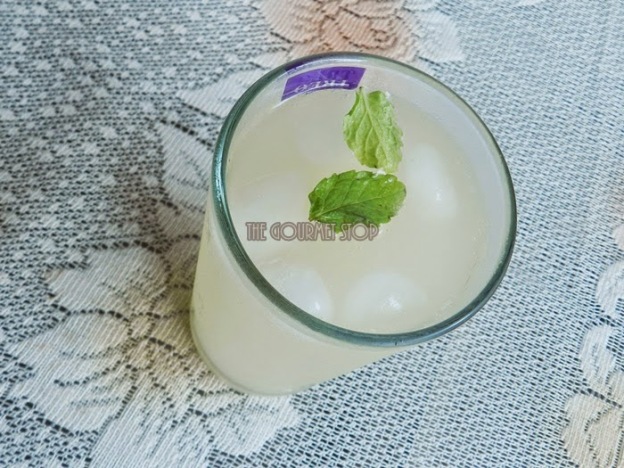
Delhi is very busy in breaking 62 years old summer time temperature records by hitting new high of 45-46-47 degrees almost everyday, forcing us to stay most of the time indoors & looking for ways to beat the heat! Well, as far as my attempts go I am trying to make recipes which help in maintaining our body temperature & keep us hydrated. Ginger Lemonade is being made almost every single day at my home but I wanted to spice up the recipe + tweak the ‘Sweet Lime Soda’ that you get in restaurants. So, I came up with this ‘Sweet Lime Soda With a Twist of Ginger & Mint’ to refresh & keep us going this summer!


Sweet Lime Soda With a Twist of Ginger & Mint Recipe

Click “Print” or “PDF” button below to save this recipe!
You will need:

1 Tbsp Grated Ginger
12-15 Mint Leaves
2 Tbsp Powdered Sugar
1 Tbsp Lemon Juice
300 ml Soda Water
Ice Cubes
Mint Leaves for garnish

Serving: Single

Steps to Make Sweet Lime Soda With a Twist of Ginger & Mint:

  1. In a large mixing bowl, add grated ginger, roughly chopped or torn with hands mint leaves, powdered sugar & ice cube.
  2. Using a muddler/whisker/madhani, extract juices from ginger & mint by mixing & pressing for 2-3 minutes.
  3. Allow it to sit for 2-3 minutes.
  4. Muddle again for few minutes till you see the juices coming out of ginger & mint.
  5. Using a strainer, strain the juice in a bowl, pressing the mixture with a spoon.
  6. Add lemon juice to strained extract.
  7. In a serving glass, pour the extract & add some ice cubes.
  8. Pour the soda water over the mixture.
  9. Give it a quick stir.
  10. Garnish with fresh mint leaves & serve.

Important Pointers:

  • Ice Cube helps in quick muddling & extracting of juices.
  • You can use granulated sugar too. I used powdered sugar because it is easy & quick to dissolve. You can even use sugar syrup.
  • Substitute sugar with honey, for more healthier version.

If you want to see how I made t Sweet Lime Soda With a Twist of Ginger & Mint, then head over to video recipe by clicking this link:


 Click “Print” or “PDF” button below to save this recipe!
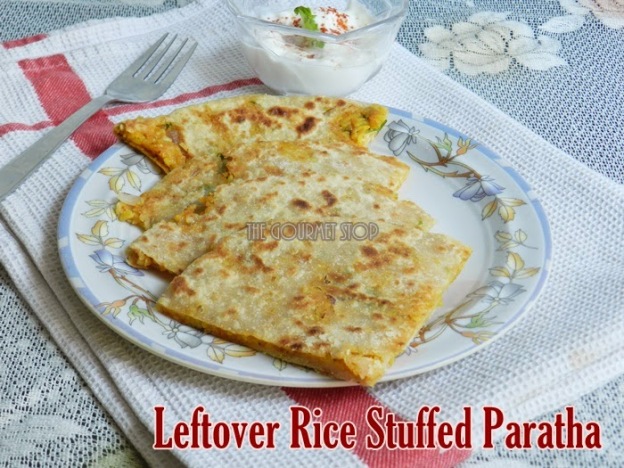
Leftover Rice Stuffed Paratha Recipe

Leftover Rice Stuffed Paratha Recipe


Simple plain rice is not a favourite recipe at my home, unless it is served with some spicy accompaniments like dal, rajma, chole, sambhar or some curry. Like, last week I made this simple rice with some cumin, turmeric, red chilli powder, potatoes & salt for my nephew (because he is a toddler!!); he sniffed it, tasted a bite, made a funny face and went back to playing! Basically, he didn’t like the taste of simple yellow rice!! So, there I had a leftover which needed to be tweaked, re-cooked & served to be loved by all. So, I came up with this interesting Leftover Rice Stuffed Paratha. I am been cautions about the calories here, so I have used little oil for cooking, you can of course shallow fry it as per your liking. Also, you can top up the paratha with a gallop of butter if you like! Yum!

Click “Print” or “PDF” button below to save this recipe!
Leftover Rice Stuffed Paratha Recipe

You will need:

1 Cup Leftover Rice
1 Medium Sized Onion Chopped
1 Green Chilli Chopped
1 Tbsp Coriander Leaves Chopped
1 .5 Tsp Red Chilli Powder (or as per taste)
1/2 Tsp Coriander Seeds Powder
2-3 Tsp Oil per Paratha
Wheat Flour Dough as required
Salt to taste

Serving: Makes about 4 Parathas

Steps to Leftover Rice Stuffed Paratha:

  1. In a mixing bowl, add leftover rice & mash the rice with your hand or in a blender.
  2. Now add in onion, green chillies, coriander leaves & mix well.
  3. Add spices – salt, red chilli powder, coriander seeds powder & mix again.
  4. Keep this stuffing aside.
  5. For rolling paratha, on a flat surface take about tennis ball size of dough & with a rolling pin, roll the dough till half way. Use dry flour to roll as needed.
  6. Place about 2-3 Tbsp stuffing kept aside at the centre of the rolled dough.
  7. Now start sealing the dough to form a round ball like shape, pressing the stuffing in.
  8. With the help of dry flour & rolling pin start rolling the stuffed dough using very light pressure & keep  sealing the ends with fingers as you roll.
  9. Quickly run a knife below the paratha in case it might have got stuck at the base.
  10. Heat a pan/tawa, drizzle oil.
  11. Place the paratha in the pan carefully.
  12. On medium flame let it cook for 30-40 seconds.
  13. Now flip the paratha with a spatula.You will see some light brown spots.
  14. Apply oil on one side & after 30-40 seconds flip it again.
  15. Press lightly with spatula & cook for another 20-30 seconds.
  16. Repeat the process other side – apply oil, flip over, press gently with spatula for few seconds.
  17. Turn the flame on high & cook for 5-8 seconds.
  18. Flip again, cook for 5-8 seconds & turn off the gas.
  19. Paratha is ready to be served.
  20. Serve with curd & top it up butter (optional).


Important Pointers:


  • Since I used rice which already had some spices in it, I didn’t add lot of spices. But if you are using plain white rice, then add turmeric powder & increase the quantity of other spices.
  • I have used very little oil for cooking. You can shallow fry it too.
  • Top up Paratha with Ghee or Butter if desired.

If you want to see how I made this Ginger Lemonade, then head over to video recipe by clicking this link:
Click “Print” or “PDF” button below to save this recipe!
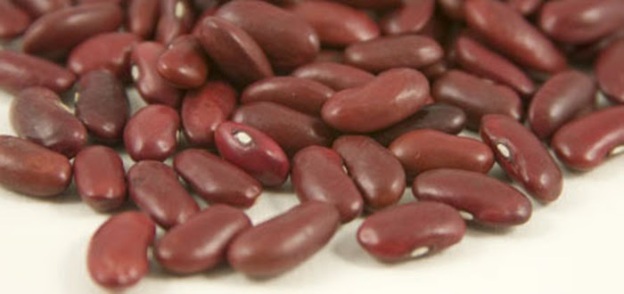
Tip of the Week: Vol 1: How to cook Chickpeas/Kabuli Chana or Kidney Beans/Rajma faster without soaking?


Tip of the Week: Vol 1: How to cook Chickpeas/Kabuli Chana or Kidney Beans/Rajma faster without soaking?


I never plan my meals in advance! No, seriously! I am more like ‘feel like eating, cook that‘ kind of person. So, when I crave for making some beans like Chana or Rajma, I usually face a hard time cooking them. You cannot just throw them in pressure cooker & cook, it will never cook through, especially Rajma. These hard beans need a minimum of 8-9 hours of soaking, which means planning ahead of time. Well, not anymore, I am sharing a quick tip with you that will bring the soaking time of these beans to 1 hour max!


Tip of the Week: Vol 1: How to cook Chickpeas/Kabuli Chana or Kidney Beans/Rajma faster without soaking?


So what you need to do is, wash your beans as usual, & put them in pressure cooker with ample of water. Add in some baking soda. Do not add salt or any other spice! Cover the pressure cooker lid & turn off the gas just before it is about to whistle. Do not wait for the pressure cooker to whistle, turn off the gas immediately before that. What exactly we are doing is holding the pressure back in the cooker & not letting it vent out. Let it stand for exactly 1 hour, before opening the lid. And voila, you will have beans looking like they have been soaked overnight. Now they are ready to cook as per the recipe! 

Chocolate Mango Milkshake Recipe : Easy Summer Milkshake Recipe

Chocolate Mango Milkshake Recipe : Easy Summer Milkshake Recipe

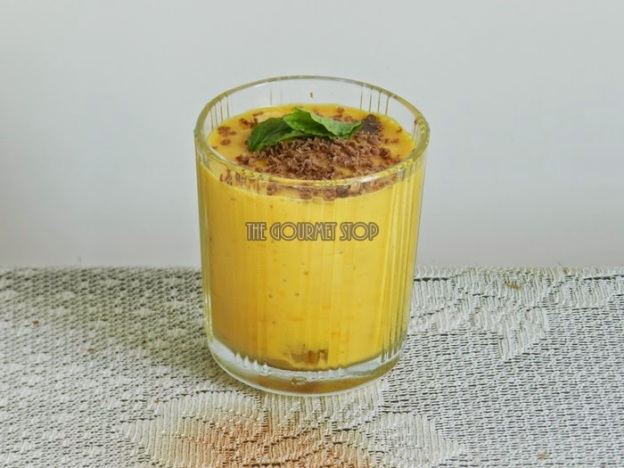
Summer time is equal to mango time in our home! We are some serious mango lovers and basically can have mangoes at anytime of the day & in any form. So, I decided to mix two of my favourite ingredients – chocolate & mangoes to create this amazing Milkshake. Chocolate + Mangoes = Yummy combination! It is again so easy to make & seriously delicious! If you choose ripe & sweet mangoes then probably you can skip the sugar completely! Plus the chocolate adds sweetness too!

Click “Print” or “PDF” button below to save this recipe!
Chocolate Mango Milkshake Recipe : Easy Summer Milkshake Recipe

You will need:

1 Cup Juicy ripe mango cut into pieces
400 ml Chilled Milk
2 Tbsp Powdered Sugar or as per taste
16 gm Milk Chocolate ( my choice Cadbury Dairy Milk)
Ice Cubes
Mint leaves & grated Chocolate for garnish

Steps to Make Chocolate Mango Milkshake:

1.       In a blending jar, add mango pieces, powdered sugar & chocolate pieces.
2.       Cover the lid & blend it for 20-30 seconds.
3.       Try to not blend the chocolate pieces a lot.
4.       Add Milk & churn for 20-30 seconds more.
5.       In a serving glass, add ice cubes & pour the Chocolate Mango Milkshake over the ice.
6.       Garnish with grated chocolate & mint leaf. 

Important Pointers:
·         You can use regular sugar if you don’t have powdered sugar.
·         I am using chocolate directly from the fridge, to avoid blending the chocolate completely. You would like to retain some pieces.

If you want to see how I made this Chocolate Mango Milkshake Recipe, then head over to video recipe by clicking this link:

Click “Print” or “PDF” button below if you want to save this recipe!

Ginger Lemonade Recipe : Indian Nimbu Pani With a Twist

Ginger Lemonade Recipe : Indian Nimbu Pani With a Twist
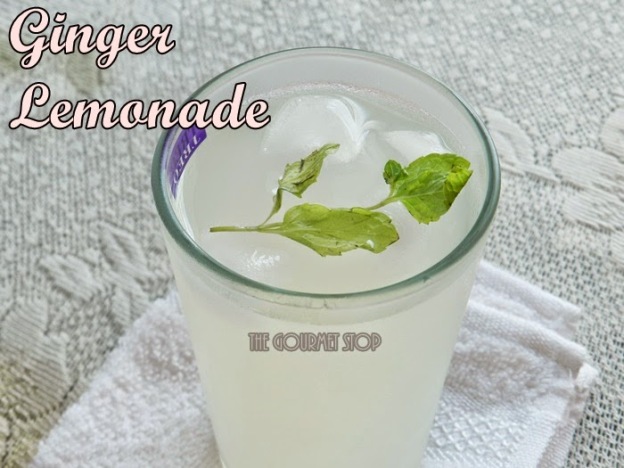
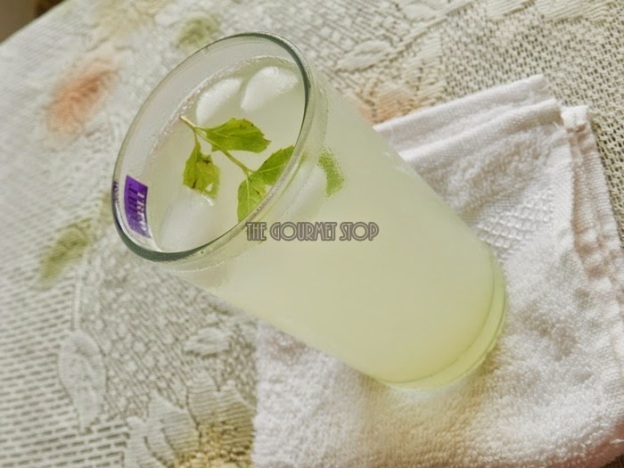
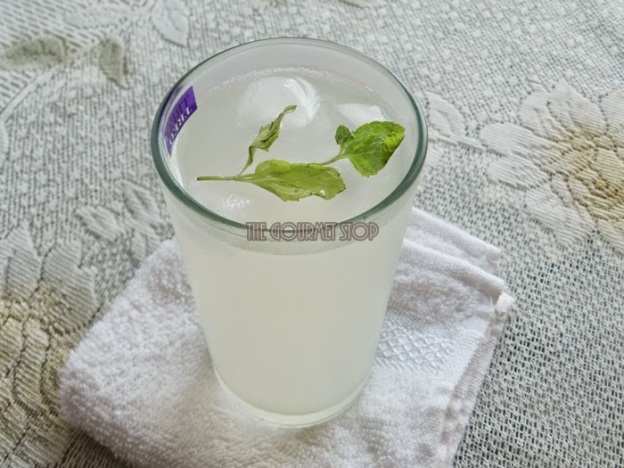
Omg it’s literally 100 degrees outside! And all I am doing nowadays is making summer drinks to keep up with the heat! After the amazing Sweet Lassi, I came up with this Ginger Lemonade recipe. Lemonade recipe you ask? Really? Well, I had this amazing Ginger Lemonade in a local restaurant in Delhi recently and I had to replicate that recipe after all ‘Make At Home’ is our objective!

This Ginger Lemonade is so perfect to beat the summer heat & its real quick to make, plus you can make a batch in the morning & have it throughout the day! Ginger adds a refreshing twist to the otherwise regular ‘Nimbu Pani’. You can use honey instead of sugar to make it healthier.


Click “Print” or “PDF” button below to save this recipe!

You will need:

300 ML Chilled Water
3 Tbsp Powdered Sugar
2 Tbsp Lemon Juice
1/2 Tbsp Ginger Juice
Ice Cubes
Serving: Single
Steps to Make Ginger Lemonade:

1.       In a mixing bowl, add powdered sugar.
2.       Add chilled water & mix well till sugar is completely dissolved.
3.       Pour in freshly squeezed Lemon juice.
4.       Followed by Ginger juice.
5.       Give it a quick stir & strain the mixture directly in a serving glass.
6.       Add in some Ice Cubes.
7.       Garnish with fresh mint leaves. (optional)

Important Pointers:

·         You can use granulated sugar too. I used powdered sugar because it is easy & quick to dissolve. You can even use sugar syrup.
·         Substitute sugar with honey, for more healthier version.
·         To make ginger juice, grate about 1 inch piece of ginger & squeeze the juice of it.
·         Ginger has a strong flavour so be careful with the quantity.

Ginger Lemonade Recipe : Indian Nimbu Pani With a Twist

If you want to see how I made this Ginger Lemonade, then head over to video recipe by clicking this link:
Click “Print” or “PDF” button below to save this recipe!
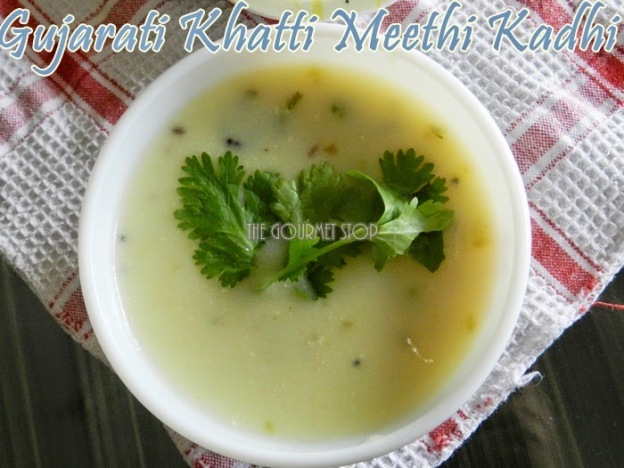
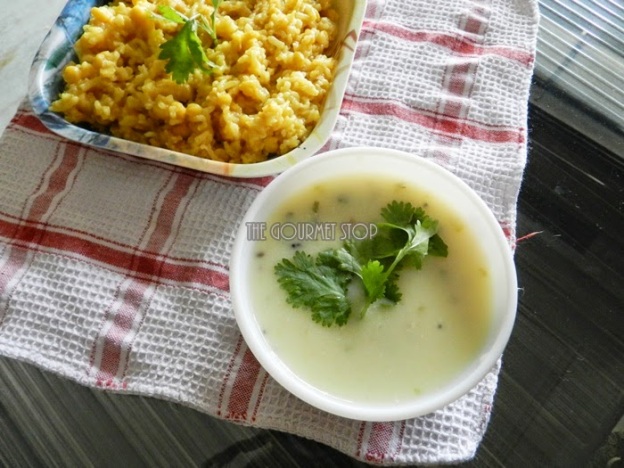
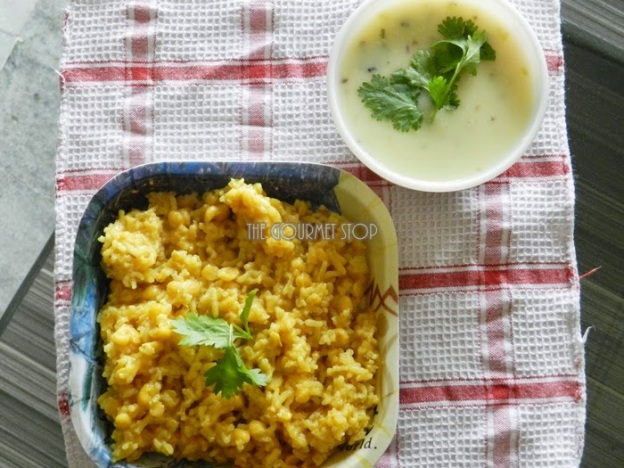
Gujarati Kadhi Recipe: Khatti Meethi Kadhi Recipe

Gujarati Kadhi Recipe: Khatti Meethi Kadhi Recipe

Gujarati Kadhi Recipe: Khatti Meethi Kadhi Recipe 

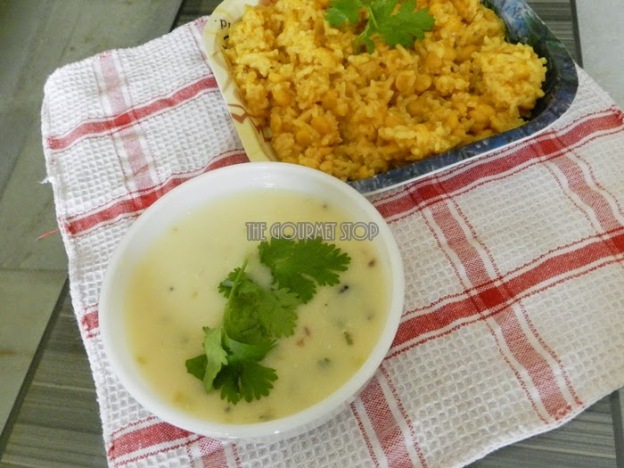
One recipe that you will frequently find in any Gujarati household is ‘Kadhi Khichdi’. At my home, I atleast make this ‘Khatti Meethi Kadhi’ once a week. It is a perfect accompaniment to ‘Khichdi’, be it of any kind. Sometimes, when I am in doubt about my lunch menu, I quickly make this ‘Gujarati Kadhi’ to accompany ‘Plain or Jeera Rice’ or even a simple ‘Pulav’. Being a Gujarati origin Kadhi, it has a perfect balance of sweetness from sugar & sour or tangy taste from curd.  Again, true to our Motto at TGS it is a quick to make recipe & you will probably find all the ingredients in your pantry!


Click “Print” or “PDF” button below if you want to save this recipe!

You will need:

½ Cup Sour Curd (you can use fresh curd if you don’t have 2-3 days old curd)
4 Cups Water
3 Tbsp Gram Flour/Besan
Salt to taste
2 Tbsp Oil
1 Tsp Mustard Seeds / Rai
½ Tsp Cumin Seeds / Jeera
1 Inch Piece of Cinnamon / Dalchini
3-4 Cloves / Laung / Laving
8-10 Curry Leaves
¼ Tsp Asafoetida / Hing
2 Tsp Green Chilli & Ginger Paste
3 Tbsp Sugar (or as per your taste)
2 Tbsp Chopped Coriander Leaves

Serving: 4 – 5 persons

Steps to Make Gujarati Khatti Meethi Kadhi:

1.       In a deep vessel, add curd, whisk it well making sure there no lumps.
2.       Next add in Gram Flour/Besan & mix again.
3.       Add water & mix. If you think there are small lumps then strain the mixture at this point once.
4.       Season the mixture with some salt & keep it aside for a while.
5.       In a separate sauce pan, heat oil & add mustard seeds/rai. Allow it to crackle.
6.       Add cumin seeds/jeera followed by cinnamon/dalchini, cloves/laving, curry leaves, asafoetida/hing.
7.       Turn off the gas immediately & let this mixture cool for about 2 minutes.
8.       After 2 minutes, add the curd mixture to the sauce pan.
9.       Bring it to a boil & keep on stirring it continuously.
10.   Now add green chilli & ginger paste and cook it for 2-3 minutes on medium to high flame, stirring it continuously.
11.   Add in sugar to add some sweetness to Kadhi.
12.   Now stirring it occasionally, let it cook on medium to low flame for about 4-5 minutes. You will see it to start thickening.
13.   Check for salt & if required add more as per your taste.
14.   Turn off the gas.
15.   Add in some freshly chopped coriander leaves.
16.   Serve hot with Khichdi or Rice.

Important Pointers:

·         Adding salt in curd & water mixture will prevent it from curdling later when it is cooked.
·         Similarly, pouring curd mixture on hot tempering will curdle it, so allow it to cool for 2-3 minutes.
·         Stirring continuously after adding the curd & mixture till it comes to boil, will prevent curdling as well as sticking of the mixture on the bottom of the pan.
·         If you do not have sour curd & you are using fresh curd, then add 1 Tbsp lemon juice in the end after turning off the gas, for some tangy-ness

Gujarati Kadhi Recipe: Khatti Meethi Kadhi Recipe

Gujarati Kadhi Recipe: Khatti Meethi Kadhi Recipe

Gujarati Kadhi Recipe: Khatti Meethi Kadhi Recipe


If you want to see how I made this Khatti Meethi Gujarati Kadhi, then head over to video recipe by clicking this link:

Click “Print” or “PDF” button below if you want to save this recipe!

2 Minute Brownie In a Mug Recipe: Dense & Fudgy Brownie Recipe!

2 Minute Brownie In a Mug Recipe: Dense & Fudgy Brownie Recipe!

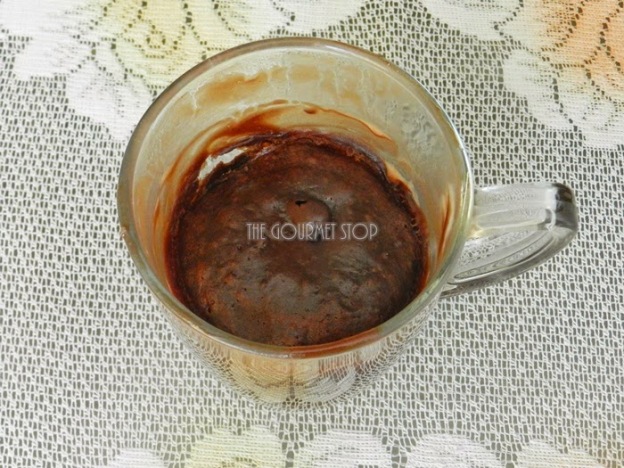
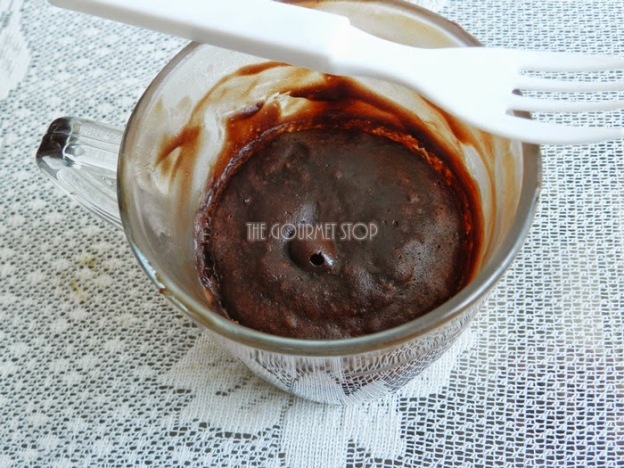
At times, when I am not really in my ‘being happy mode’ for various reasons – politics, corruption, a stupid fight with husband etc, I turn to food for comfort. And at those emotional times, this 2 Minute Mug Brownie is perfect for indulgence! Well, of course, you don’t necessarily need to be emotionally upset over things to have this dense chocolate brownie; you can have it at happier times too! It is so easy & quick to make, you literally just through in few ingredients from your pantry – no fancy big list! Promise! To make it fudgier, my secret ingredient is ‘Dairy Milk Chocolate’! It takes this simple brownie to next level of yumminess!!

2 Minute Brownie In a Mug Recipe: Dense & Fudgy Brownie Recipe!


Click “Print” or “PDF” button below if you want to save this recipe!

Things you will need:

4 Tbsp Refined Flour/Maida
2 Tbsp Unsweetened Cocoa Powder
4 Tbsp Powdered Sugar
2 Tbsp Oil/Butter
4 Tbsp + 2 Tbsp Milk (or as required)
1-2 Drops Vanilla Essence (optional)
15gm Milk Chocolate (I used Dairy Milk)

Serving: Single

Steps to Make Authentic Punjabi Sweet Lassi:

1.       In a microwave safe mug, add Dairy Milk chocolate. You can use any milk chocolate that is handy.
2.       Microwave this for 10 seconds, if using from the fridge directly. Just to make it easier to work with.
3.       Once out of microwave, with the help of a spoon, mix it well.
4.       Now add in dry ingredients – Flour/Maida, Cocoa Powder, Powdered sugar.
5.       Wet Ingredients – Oil &Milk
6.       Mix everything really well making sure there no lumps.
7.       At this point you might need to add a little bit more milk depending upon the consistency you achieve after mixing. If you feel it’s too dry add in 1-2 Tbsp more milk.  
8.       Few drops of vanilla essence (optional). Give it a final mix.
9.       Microwave it on high power for 1 minute for Dense Chocolate-y Brownie
10.   Serve with a dollop of Ice Cream if you have any!

Important Pointers:

·         Never use Olive Oil, it has a prominent smell to it & you do not want that over powering the chocolate fragrance.
·         If you using Dairy Milk at room temperature, you can skip the melting step in microwave for 10 seconds.
·         If melting the chocolate in microwave, make sure you do not overdo it, as milk chocolate can burn quickly.
·         For even more chocolate flavour, you can use sweet dark chocolate instead of milk one.
·         For dense & fudge-y brownie do not overcook the mixture. Keep an eye on it as it can turn into a cake in seconds.
·         If you like your brownies to be more cake-like texture then cook it for 1.5 -2 minutes on high power.

2 Minute Brownie In a Mug Recipe: Dense & Fudgy Brownie Recipe!

2 Minute Brownie In a Mug Recipe: Dense & Fudgy Brownie Recipe!

If you want to see how I made this Mug Brownie, then head over to video recipe by clicking this link:


Click “Print” or “PDF” button below if you want to save this recipe!

Traditional Punjabi Sweet Lassi Recipe: Indian Yoghurt Smoothie Recipe!

Authentic Punjabi Sweet Lassi Recipe: Indian Yoghurt Smoothie Recipe!
Traditional Punjabi Sweet Lassi Recipe: Indian Yoghurt Smoothie Recipe! 

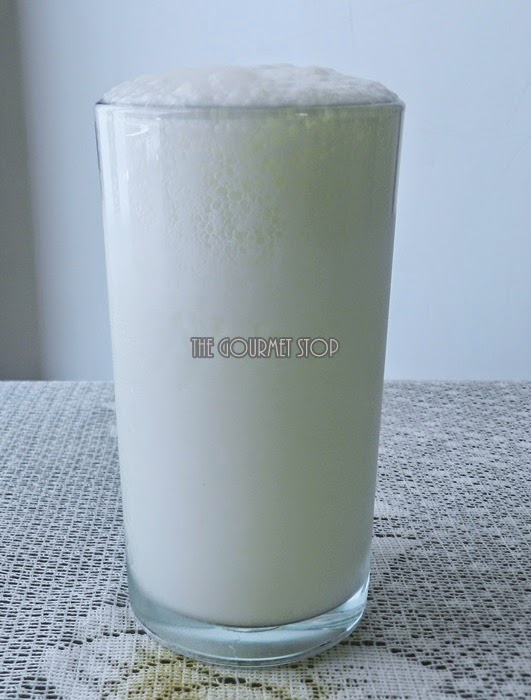
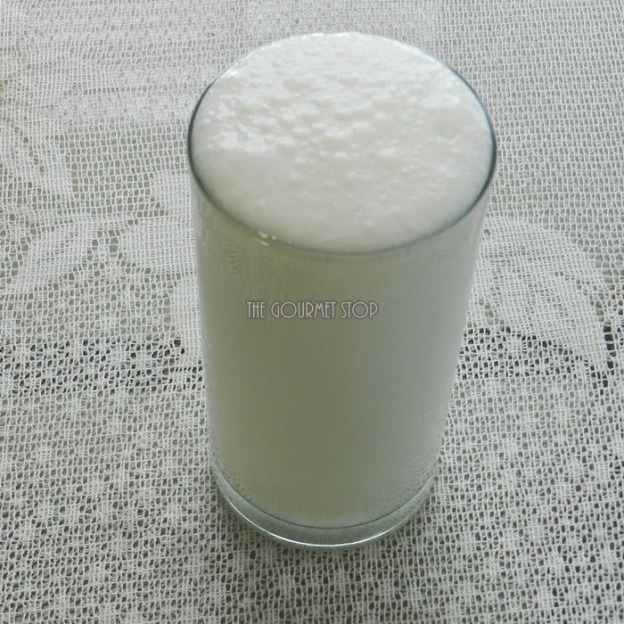
When I visited my Aunt in Punjab sometime ago, she made this amazing Sweet Lassi for us! It was sooooo delicious that it left us licking our lips after every sip! Not to mention it was kind of heavy for our appetite & when it is served in tall brass glass, you can easily skip a meal. I had to get this recipe & wanted her tips & tricks to make that perfect glass of Sweet Lassi to beat the heat this summer!

My aunt began by telling me that even with all the new age gadgets available in kitchen, she prefers making it traditional way – with a Wooden Churner or Madhani! She says no blender can beat the taste of Lassi made with Madhani & I totally have to agree with her on this! If you use a Madhani, then you can in no way over beat/muddle the curd whereas with a blender in a matter of seconds curd can turn into butter, spoiling the Lassi! She also did mention that always use fresh curd made from full fat milk for creamier Lassi. Fresh curd has slight sweetness to it & you can cheat on by adding less sugar. And of course, in Punjab they have to add a dollop of butter or cream on Lassi but I am totally gonna skip it!! Watching those extra calories 😉 Trust me it’s still going to taste super delicious!
Authentic Punjabi Sweet Lassi Recipe: Indian Yoghurt Smoothie Recipe!

Authentic Punjabi Sweet Lassi Recipe: Indian Yoghurt Smoothie Recipe!
Click “Print” or “PDF” button below to save this recipe!
You will need:

1/2 Cup Full Fat Milk Curd (Fresh)
3 Tbsp Powdered Sugar or as required
1/2 Cup Chilled Water
4-5 Ice Cubes

Serving: 1 Glass

Steps to Make Authentic Punjabi Sweet Lassi:

1.       In a deep vessel, add curd & churn it with a Wooden Churner/Madhani or even a Muddler until it’s smooth & lumps free. It should take about 1-2 minutes.
2.       Add in powdered sugar & muddle for another 1-2 minutes.
3.       Once sugar is dissolved, add chilled water.
4.       Churn for another 1-2 minutes to get that froth! The more you churn, frothier Lassi will become. But make sure you do not overdo it.
5.       Pop in some Ice Cubes & serve chilled!

Important Pointers:

·         If you don’t have the wooden churner, just add everything in a blender & blend for 1-2 minutes maximum. Do not overbeat it or else curd will turn into butter.
·         We are using powdered sugar because it takes less time to dissolve.
·         Always use fresh curd to make Lassi.
·         Using chilled water will make the frothing process faster.

If you want to see how I made this Punjabi Sweet Lassi, then head over to video recipe by clicking this link:


Click “Print” or “PDF” button below to save this recipe!