Monthly Archives: May 2014

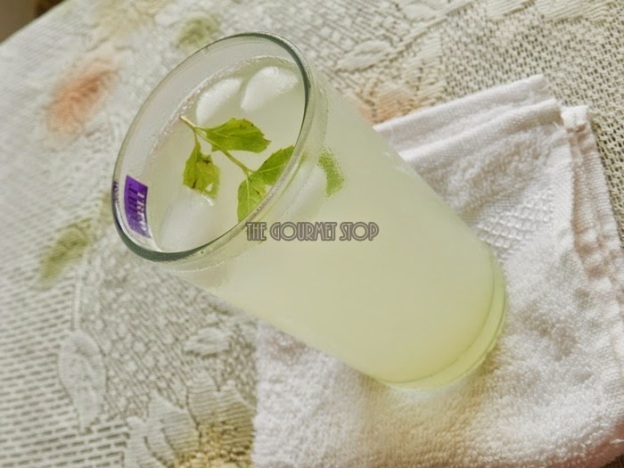
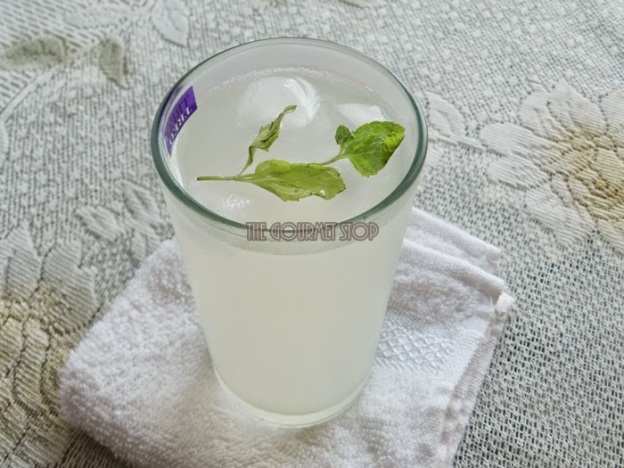
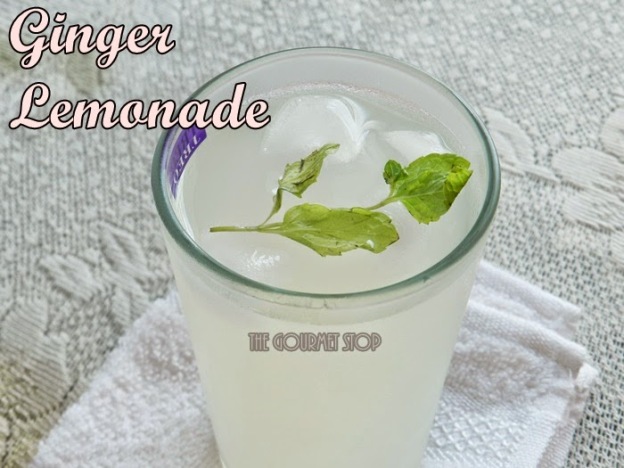
Ginger Lemonade Recipe : Indian Nimbu Pani With a Twist

Ginger Lemonade Recipe : Indian Nimbu Pani With a Twist
Omg it’s literally 100 degrees outside! And all I am doing nowadays is making summer drinks to keep up with the heat! After the amazing Sweet Lassi, I came up with this Ginger Lemonade recipe. Lemonade recipe you ask? Really? Well, I had this amazing Ginger Lemonade in a local restaurant in Delhi recently and I had to replicate that recipe after all ‘Make At Home’ is our objective!

This Ginger Lemonade is so perfect to beat the summer heat & its real quick to make, plus you can make a batch in the morning & have it throughout the day! Ginger adds a refreshing twist to the otherwise regular ‘Nimbu Pani’. You can use honey instead of sugar to make it healthier.


Click “Print” or “PDF” button below to save this recipe!

You will need:

300 ML Chilled Water
3 Tbsp Powdered Sugar
2 Tbsp Lemon Juice
1/2 Tbsp Ginger Juice
Ice Cubes
Serving: Single
Steps to Make Ginger Lemonade:

1.       In a mixing bowl, add powdered sugar.
2.       Add chilled water & mix well till sugar is completely dissolved.
3.       Pour in freshly squeezed Lemon juice.
4.       Followed by Ginger juice.
5.       Give it a quick stir & strain the mixture directly in a serving glass.
6.       Add in some Ice Cubes.
7.       Garnish with fresh mint leaves. (optional)

Important Pointers:

·         You can use granulated sugar too. I used powdered sugar because it is easy & quick to dissolve. You can even use sugar syrup.
·         Substitute sugar with honey, for more healthier version.
·         To make ginger juice, grate about 1 inch piece of ginger & squeeze the juice of it.
·         Ginger has a strong flavour so be careful with the quantity.

Ginger Lemonade Recipe : Indian Nimbu Pani With a Twist

If you want to see how I made this Ginger Lemonade, then head over to video recipe by clicking this link:
Click “Print” or “PDF” button below to save this recipe!

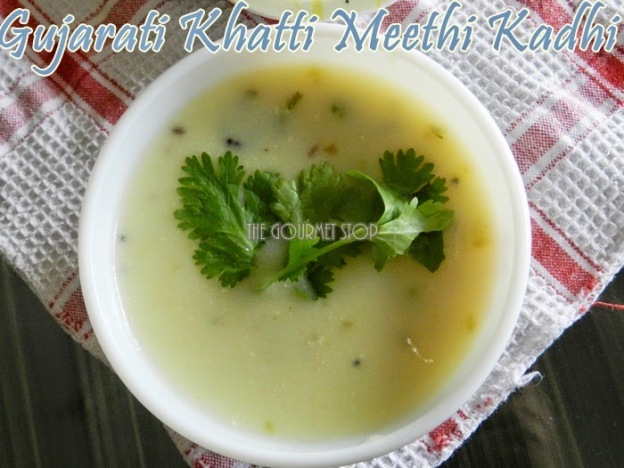
Gujarati Kadhi Recipe: Khatti Meethi Kadhi Recipe

Gujarati Kadhi Recipe: Khatti Meethi Kadhi Recipe

Gujarati Kadhi Recipe: Khatti Meethi Kadhi Recipe 

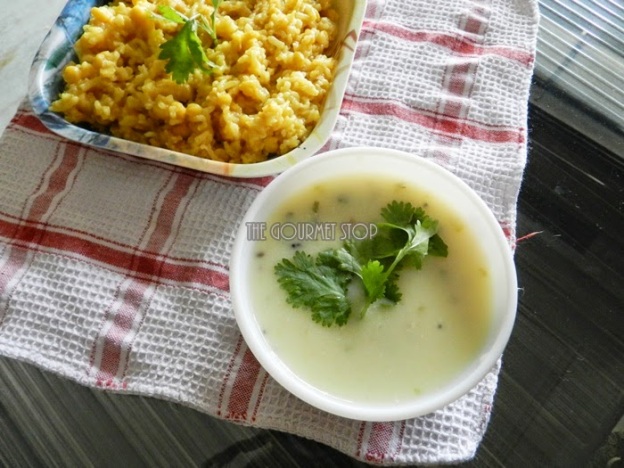
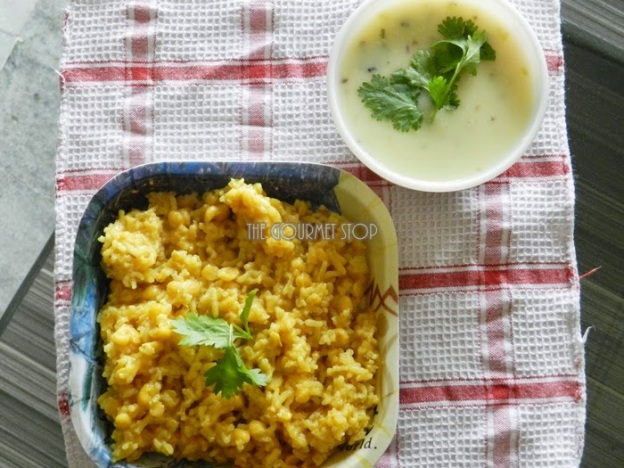
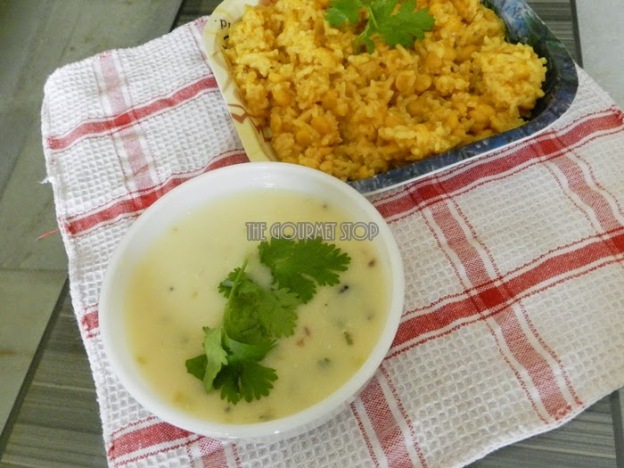
One recipe that you will frequently find in any Gujarati household is ‘Kadhi Khichdi’. At my home, I atleast make this ‘Khatti Meethi Kadhi’ once a week. It is a perfect accompaniment to ‘Khichdi’, be it of any kind. Sometimes, when I am in doubt about my lunch menu, I quickly make this ‘Gujarati Kadhi’ to accompany ‘Plain or Jeera Rice’ or even a simple ‘Pulav’. Being a Gujarati origin Kadhi, it has a perfect balance of sweetness from sugar & sour or tangy taste from curd.  Again, true to our Motto at TGS it is a quick to make recipe & you will probably find all the ingredients in your pantry!


Click “Print” or “PDF” button below if you want to save this recipe!

You will need:

½ Cup Sour Curd (you can use fresh curd if you don’t have 2-3 days old curd)
4 Cups Water
3 Tbsp Gram Flour/Besan
Salt to taste
2 Tbsp Oil
1 Tsp Mustard Seeds / Rai
½ Tsp Cumin Seeds / Jeera
1 Inch Piece of Cinnamon / Dalchini
3-4 Cloves / Laung / Laving
8-10 Curry Leaves
¼ Tsp Asafoetida / Hing
2 Tsp Green Chilli & Ginger Paste
3 Tbsp Sugar (or as per your taste)
2 Tbsp Chopped Coriander Leaves

Serving: 4 – 5 persons

Steps to Make Gujarati Khatti Meethi Kadhi:

1.       In a deep vessel, add curd, whisk it well making sure there no lumps.
2.       Next add in Gram Flour/Besan & mix again.
3.       Add water & mix. If you think there are small lumps then strain the mixture at this point once.
4.       Season the mixture with some salt & keep it aside for a while.
5.       In a separate sauce pan, heat oil & add mustard seeds/rai. Allow it to crackle.
6.       Add cumin seeds/jeera followed by cinnamon/dalchini, cloves/laving, curry leaves, asafoetida/hing.
7.       Turn off the gas immediately & let this mixture cool for about 2 minutes.
8.       After 2 minutes, add the curd mixture to the sauce pan.
9.       Bring it to a boil & keep on stirring it continuously.
10.   Now add green chilli & ginger paste and cook it for 2-3 minutes on medium to high flame, stirring it continuously.
11.   Add in sugar to add some sweetness to Kadhi.
12.   Now stirring it occasionally, let it cook on medium to low flame for about 4-5 minutes. You will see it to start thickening.
13.   Check for salt & if required add more as per your taste.
14.   Turn off the gas.
15.   Add in some freshly chopped coriander leaves.
16.   Serve hot with Khichdi or Rice.

Important Pointers:

·         Adding salt in curd & water mixture will prevent it from curdling later when it is cooked.
·         Similarly, pouring curd mixture on hot tempering will curdle it, so allow it to cool for 2-3 minutes.
·         Stirring continuously after adding the curd & mixture till it comes to boil, will prevent curdling as well as sticking of the mixture on the bottom of the pan.
·         If you do not have sour curd & you are using fresh curd, then add 1 Tbsp lemon juice in the end after turning off the gas, for some tangy-ness

Gujarati Kadhi Recipe: Khatti Meethi Kadhi Recipe

Gujarati Kadhi Recipe: Khatti Meethi Kadhi Recipe

Gujarati Kadhi Recipe: Khatti Meethi Kadhi Recipe


If you want to see how I made this Khatti Meethi Gujarati Kadhi, then head over to video recipe by clicking this link:

Click “Print” or “PDF” button below if you want to save this recipe!

2 Minute Brownie In a Mug Recipe: Dense & Fudgy Brownie Recipe!

2 Minute Brownie In a Mug Recipe: Dense & Fudgy Brownie Recipe!

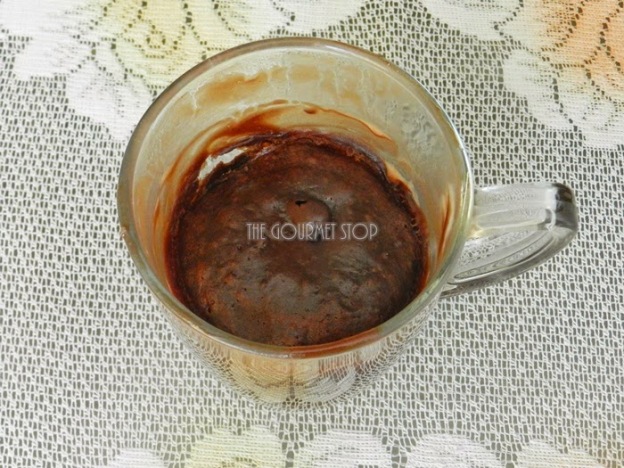
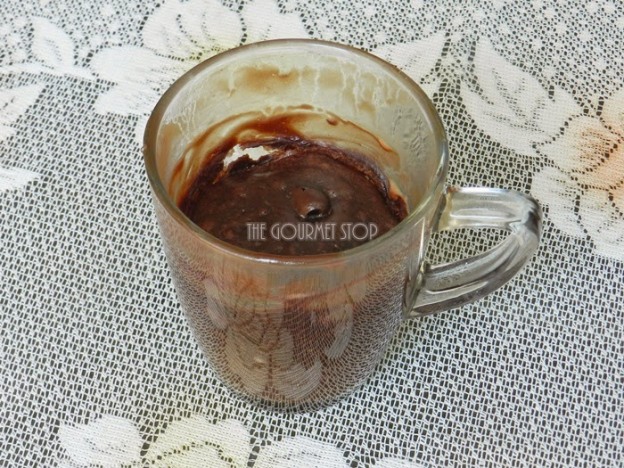
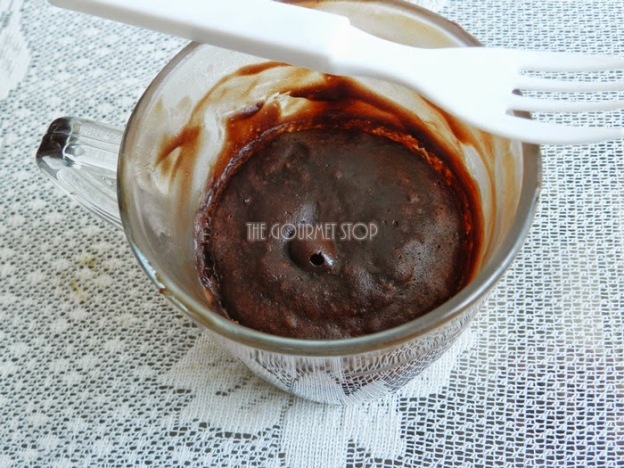
At times, when I am not really in my ‘being happy mode’ for various reasons – politics, corruption, a stupid fight with husband etc, I turn to food for comfort. And at those emotional times, this 2 Minute Mug Brownie is perfect for indulgence! Well, of course, you don’t necessarily need to be emotionally upset over things to have this dense chocolate brownie; you can have it at happier times too! It is so easy & quick to make, you literally just through in few ingredients from your pantry – no fancy big list! Promise! To make it fudgier, my secret ingredient is ‘Dairy Milk Chocolate’! It takes this simple brownie to next level of yumminess!!

2 Minute Brownie In a Mug Recipe: Dense & Fudgy Brownie Recipe!


Click “Print” or “PDF” button below if you want to save this recipe!

Things you will need:

4 Tbsp Refined Flour/Maida
2 Tbsp Unsweetened Cocoa Powder
4 Tbsp Powdered Sugar
2 Tbsp Oil/Butter
4 Tbsp + 2 Tbsp Milk (or as required)
1-2 Drops Vanilla Essence (optional)
15gm Milk Chocolate (I used Dairy Milk)

Serving: Single

Steps to Make Authentic Punjabi Sweet Lassi:

1.       In a microwave safe mug, add Dairy Milk chocolate. You can use any milk chocolate that is handy.
2.       Microwave this for 10 seconds, if using from the fridge directly. Just to make it easier to work with.
3.       Once out of microwave, with the help of a spoon, mix it well.
4.       Now add in dry ingredients – Flour/Maida, Cocoa Powder, Powdered sugar.
5.       Wet Ingredients – Oil &Milk
6.       Mix everything really well making sure there no lumps.
7.       At this point you might need to add a little bit more milk depending upon the consistency you achieve after mixing. If you feel it’s too dry add in 1-2 Tbsp more milk.  
8.       Few drops of vanilla essence (optional). Give it a final mix.
9.       Microwave it on high power for 1 minute for Dense Chocolate-y Brownie
10.   Serve with a dollop of Ice Cream if you have any!

Important Pointers:

·         Never use Olive Oil, it has a prominent smell to it & you do not want that over powering the chocolate fragrance.
·         If you using Dairy Milk at room temperature, you can skip the melting step in microwave for 10 seconds.
·         If melting the chocolate in microwave, make sure you do not overdo it, as milk chocolate can burn quickly.
·         For even more chocolate flavour, you can use sweet dark chocolate instead of milk one.
·         For dense & fudge-y brownie do not overcook the mixture. Keep an eye on it as it can turn into a cake in seconds.
·         If you like your brownies to be more cake-like texture then cook it for 1.5 -2 minutes on high power.

2 Minute Brownie In a Mug Recipe: Dense & Fudgy Brownie Recipe!

2 Minute Brownie In a Mug Recipe: Dense & Fudgy Brownie Recipe!

If you want to see how I made this Mug Brownie, then head over to video recipe by clicking this link:


Click “Print” or “PDF” button below if you want to save this recipe!

Traditional Punjabi Sweet Lassi Recipe: Indian Yoghurt Smoothie Recipe!

Authentic Punjabi Sweet Lassi Recipe: Indian Yoghurt Smoothie Recipe!
Traditional Punjabi Sweet Lassi Recipe: Indian Yoghurt Smoothie Recipe! 

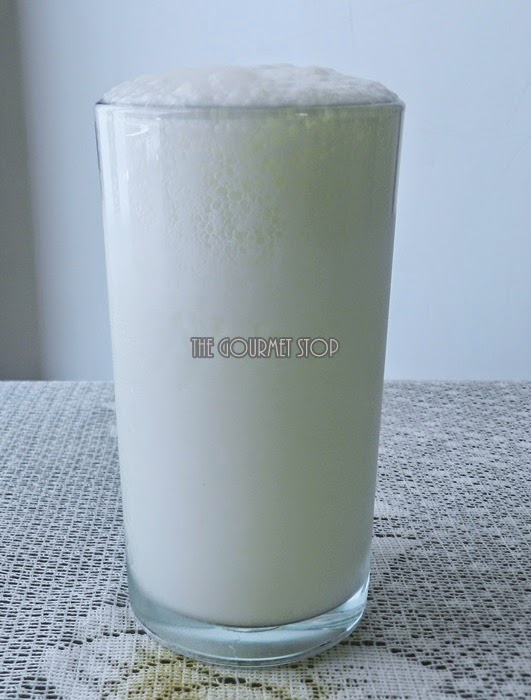
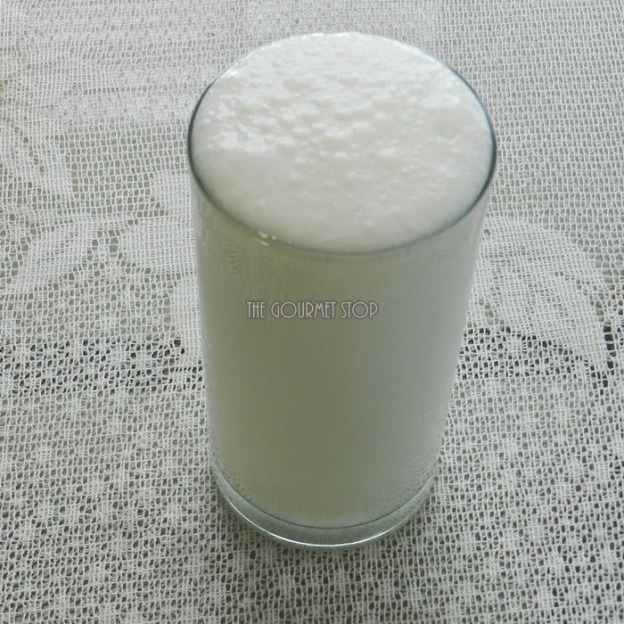
When I visited my Aunt in Punjab sometime ago, she made this amazing Sweet Lassi for us! It was sooooo delicious that it left us licking our lips after every sip! Not to mention it was kind of heavy for our appetite & when it is served in tall brass glass, you can easily skip a meal. I had to get this recipe & wanted her tips & tricks to make that perfect glass of Sweet Lassi to beat the heat this summer!

My aunt began by telling me that even with all the new age gadgets available in kitchen, she prefers making it traditional way – with a Wooden Churner or Madhani! She says no blender can beat the taste of Lassi made with Madhani & I totally have to agree with her on this! If you use a Madhani, then you can in no way over beat/muddle the curd whereas with a blender in a matter of seconds curd can turn into butter, spoiling the Lassi! She also did mention that always use fresh curd made from full fat milk for creamier Lassi. Fresh curd has slight sweetness to it & you can cheat on by adding less sugar. And of course, in Punjab they have to add a dollop of butter or cream on Lassi but I am totally gonna skip it!! Watching those extra calories 😉 Trust me it’s still going to taste super delicious!
Authentic Punjabi Sweet Lassi Recipe: Indian Yoghurt Smoothie Recipe!

Authentic Punjabi Sweet Lassi Recipe: Indian Yoghurt Smoothie Recipe!
Click “Print” or “PDF” button below to save this recipe!

You will need:

1/2 Cup Full Fat Milk Curd (Fresh)
3 Tbsp Powdered Sugar or as required
1/2 Cup Chilled Water
4-5 Ice Cubes

Serving: 1 Glass

Steps to Make Authentic Punjabi Sweet Lassi:

1.       In a deep vessel, add curd & churn it with a Wooden Churner/Madhani or even a Muddler until it’s smooth & lumps free. It should take about 1-2 minutes.
2.       Add in powdered sugar & muddle for another 1-2 minutes.
3.       Once sugar is dissolved, add chilled water.
4.       Churn for another 1-2 minutes to get that froth! The more you churn, frothier Lassi will become. But make sure you do not overdo it.
5.       Pop in some Ice Cubes & serve chilled!

Important Pointers:

·         If you don’t have the wooden churner, just add everything in a blender & blend for 1-2 minutes maximum. Do not overbeat it or else curd will turn into butter.
·         We are using powdered sugar because it takes less time to dissolve.
·         Always use fresh curd to make Lassi.
·         Using chilled water will make the frothing process faster.

If you want to see how I made this Punjabi Sweet Lassi, then head over to video recipe by clicking this link:


Click “Print” or “PDF” button below to save this recipe!

Cold Cocoa Recipe: Chocolate Milk Shake Recipe

Cold Cocoa Recipe: Chocolate Milk Shake Recipe

Cold Cocoa Recipe: Chocolate Milk Shake Recipe


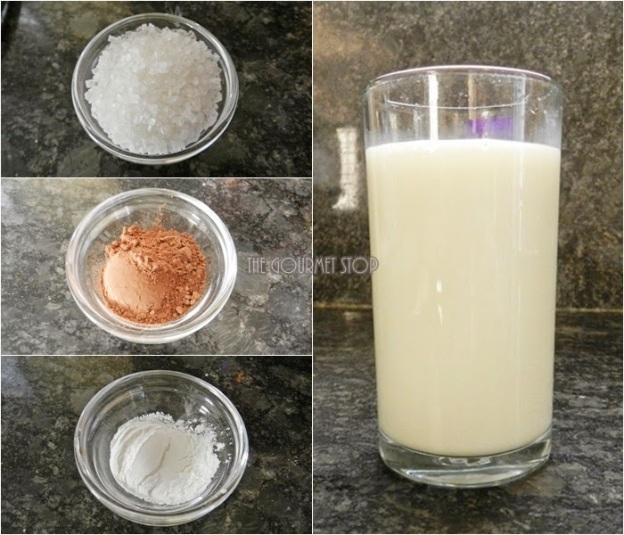
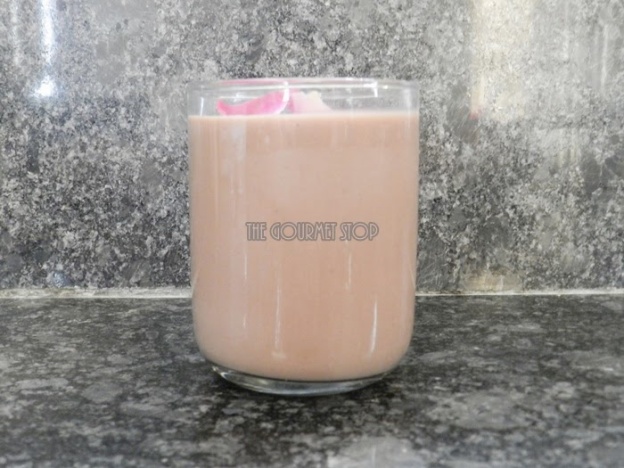
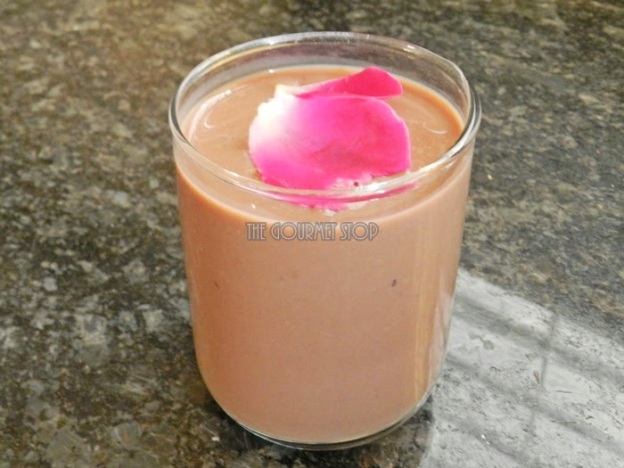
Cold Cocoa has been my favourite since school days & I love it so much that felt the need to replicate it! After so many trials & errors, I finally discovered the perfect recipe, after all our motto at TGS is ‘Make At Home’! J  Cold Cocoa when made following this recipe tastes fantastic! I am kind of proud to say that it tastes even better than outside! You must give it a try if you loooove chocolate flavour drinks. It’s so quick, simple & economical too! 


Cold Cocoa Recipe: Chocolate Cocoa Milk Shake
Click “Print” or “PDF” button below to save this recipe!

You will need:

500ml + 2 Tbsp Milk
4 Tbsp Sugar
5 Tsp Cocoa Powder
2 Tsp Cornflour
Rose Petals for garnish (optional)

Serving: 2 Glasses
Steps to Make Cold Cocoa:

1.      Begin by mixing 2 Tbsp Milk+ Cocoa Powder + Cornflour well in a bowl. Take your time and make sure there are no lumps.
2.      In a separate sauce pan or any deep pan, heat milk and add sugar to it. Mix occasionally to ensure milk doesn’t stick to the bottom of the pan.
3.      Once it comes to a boil, add in the cocoa powder, cornflour & milk mixture prepared earlier.
4.      Stir this continuously making sure there are no lumps.
5.      Because of the cornflour the milk will start to thicken, keep it on medium to low flame for about a minute. After that turn of the gas & let it cool on room temperature.
6.      Once cooled to room temperature, sieve this mixture to make sure there are no lumps remaining at all.
7.      Keep it in the refrigerator for atleast 6 hours.
8.       Garnish with nuts or rose petals. Serve chilled.

Cheat Tricks: If you are a health conscious & want to indulge in this yummy drink guilt free then replace full fat milk with low fat or skimmed milk. I wouldn’t suggest altering sugar or any other ingredient ratio as it won’t taste as good as this. Believe me I have tried & it wasn’t good.

If you want to see how I made this Cold Cocoa Recipe, then head over to video recipe by clicking this link:


Click “Print” or “PDF” button below to save this recipe!

Basics 101: How to Sprout Beans!

Basics 101: How to Sprout Beans!

Basics 101: How to Sprout Beans!

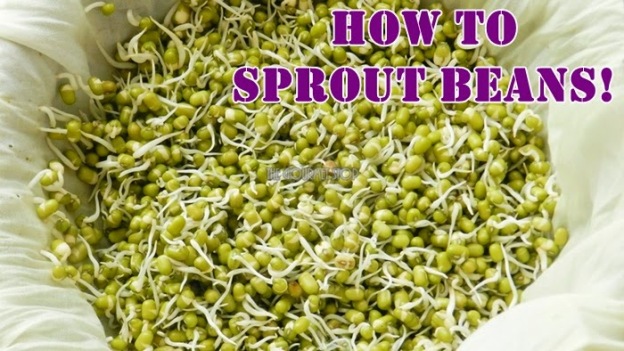
Let’s talk about some basics today, sprouts! You can sprout any form of beans & pulses, they have high nutritional value and protein rich. Sprouting Green Gram (Moong) is the most easy of all. So, let’s begin! We are sprouting 1 Cup of Moong & the final result will be almost double the quantity of sprouts.

Click “Print” or “PDF” button below if you want to save this recipe!


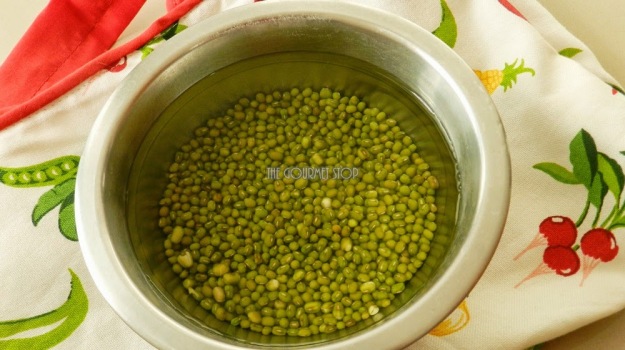
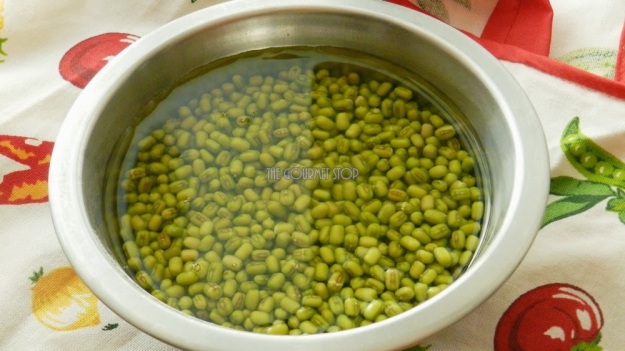
Wash your beans really well, make sure there is no dirt & soak it in 3 times water for about 8 hours or overnight.

Basics 101: How to Sprout Beans!


This is how it will look after soaking.

Basics 101: How to Sprout Beans!

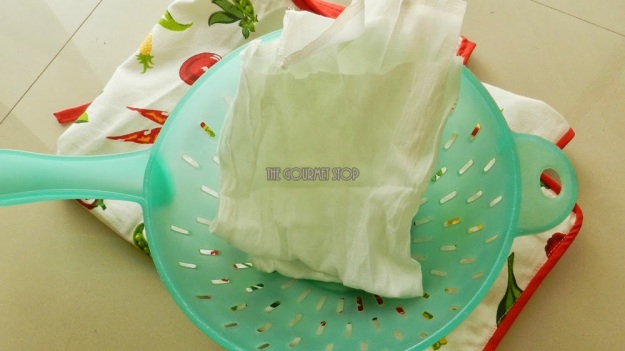
For next step you need to strain the water from the beans and dampen a muslin cloth or any kind of thin cloth.

Basics 101: How to Sprout Beans!


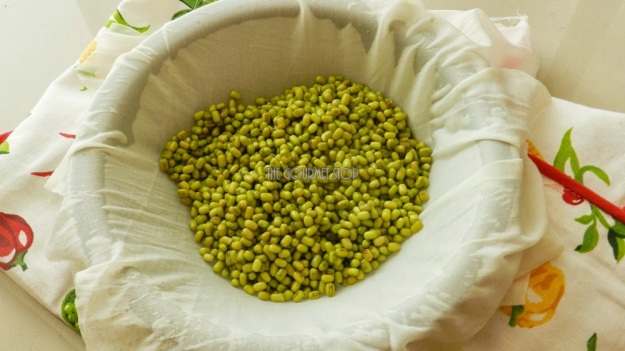
Use a stainless steel bowl or any vessel which is not transparent. Sprouting process takes place best in dark environment. Spread the damp cloth over the bowl & place the beans inside.

Basics 101: How to Sprout Beans!


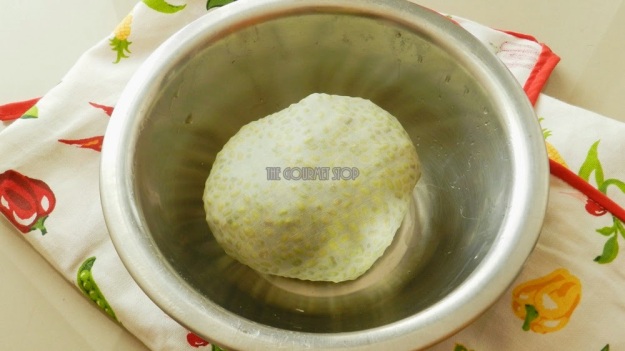
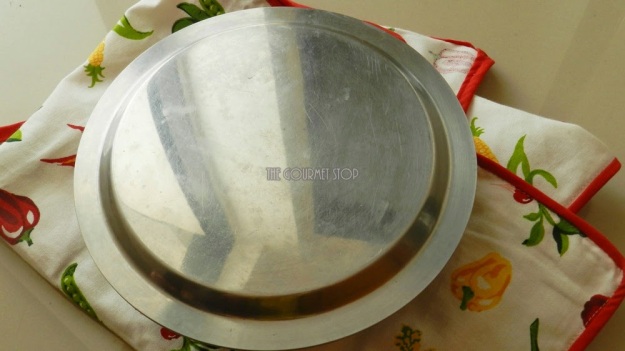
Make a potli or fold it well & keep it upside down.

Basics 101: How to Sprout Beans!


Cover with a lid, again it should be opaque. Put this bowl in a closed cabinet or turned off oven, anywhere where there is no direct light for a day atleast.

Basics 101: How to Sprout Beans!


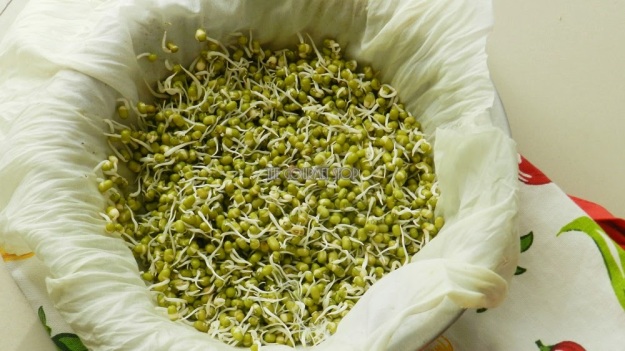
When you will check next day, your sprouts will be ready. If you feel the beans had not sprouted enough you can keep it back in dark place for another few hours or even a day.

Basics 101: How to Sprout Beans!


If you want to see how I Sprout Beans, then head over to video recipe by clicking this link:

Click “Print” or “PDF” button below if you want to save this recipe!

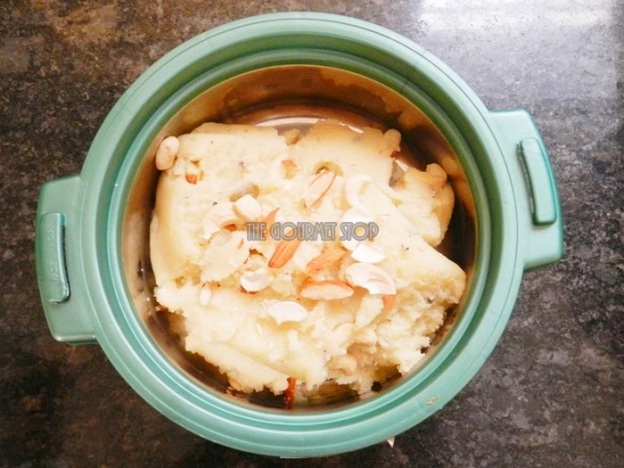
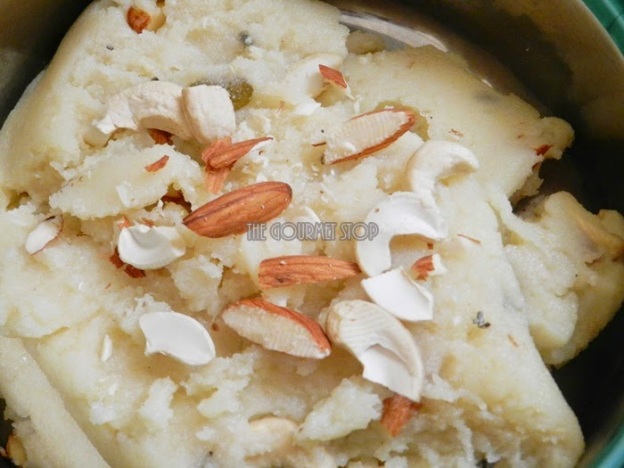
Sooji Ka Halwa – Rava Sheera Recipe – Little Less Calories Version!

Sooji Ka Halwa - Rava Sheera Recipe - Little Less Calories Version!

Sooji Ka Halwa – Rava Sheera Recipe – Little Less Calories Version!

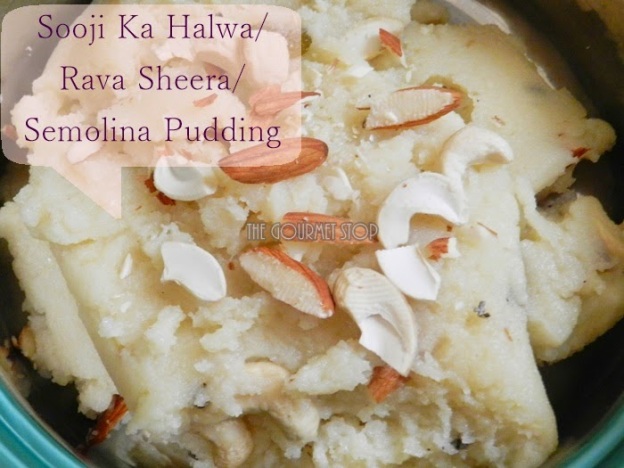
Sooji Ka Halwa or also known as Rava Sheera or Semolina Pudding is a very common sweet dish served across India. Sooji Ka Halwa is generally prepared in many households for poojas & ceremonies. Generally accompanied with savory Chole Puri or Aloo Puri, it is one delicious & simple recipe to cook. Though the ratio of sooji (semolina), sugar & ghee (clarified butter) are used in equal proportion, I have tweaked the recipe to bring the calories count down a bit.

Sooji Ka Halwa - Rava Sheera Recipe - Little Less Calories Version!

Click “Print” or “PDF” button below to save this recipe!

You will need:

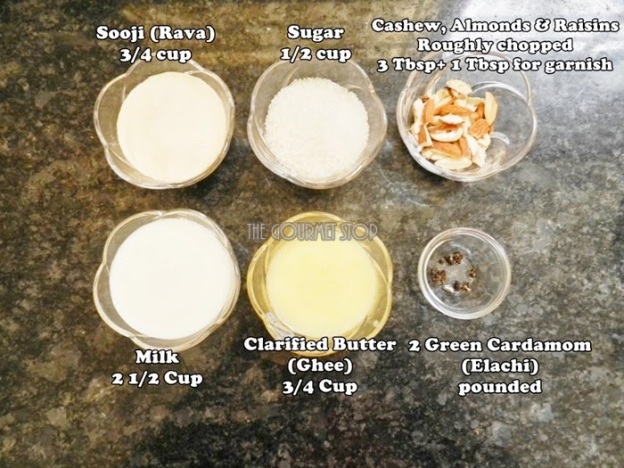
3/4 Cup Rava/Sooji/Semolina (use the fine variety of rava)
1/2 Cup Sugar (original recipe says 3/4 Cup)
3/4 Cup Ghee/Clarified Butter
2 ½ Cup Milk (Full fat or low fat as you prefer)
3 Tbsp + 1 Tbsp Roughly chopped Cashewnuts, Almonds & Raisins
2 Green Cardamom/Elachi pounded

Serving: 2-3 persons

Steps to Make Sooji Ka Halwa:  

  1. In a deep pan, begin by mixing sooji & ghee. 
  2. Turn on the gas on low flame & let it cook till ghee separates from sooji. 
  3. Keep stirring frequently or continuously to make sure sooji doesn’t burn. It will take about 6-7 minutes. 
  4. Once the ghee separates, let it cook till sooji turns slightly pink in color. 
  5. Once it reaches the desired color, add milk & keep on stirring it continuously. Make sure there are no lumps. 
  6. When sooji absorbs the entire milk & the mixtures leaves the pan sides, its time to add the sugar. 
  7. And when sugar completely dissolves in the mixture, add green cardamom, dryfruits.
  8. Turn off the gas & garnish it with few more nuts.

Important Pointers: 

  • Many people prefer their halwa to be a little dark but I prefer it whitish in color. If you want  pinkish brown color then continue cooking for few more minutes at Step 3.
  • I have added only ½ Cup sugar as opposed to ¾ Cup but you can add more if you like your halwa to be sweet.
Sooji Ka Halwa - Rava Sheera Recipe - Little Less Calories Version!

If you want to see how I made this Sooji Ka Halwa, then head over to video recipe by clicking this link:


Click “Print” or “PDF” button below if you want to save this recipe!

Basics 101: Green Coriander Chutney Recipe

Basics 101: Green Coriander Chutney Recipe

Let’s talk about something basic today, Green Chutney or Coriander Chutney. And keeping true to the motto of TGS – Easy & Tasty food, this recipe accompanies many many recipes! In my home, it is a ritual to make this Chutney twice a week, yes it is used that frequently! At all times Green Coriander Chutney is a must in my fridge. This Chutney is so versatile it can be served with Parathas, Theplas, various Snacks, in sandwiches & many more. Try it with Leftover Rice Stuffed Paratha Recipe & you will love the combo! I have another elaborated version of Green Coriander Chutney, which I will soon share here. I alternate between these two recipes, both tastes awesome.


Click “Print” or “PDF” button below to save this recipe!
You will need:

2 Tbsp Peanuts
1 Small Diced Onion
1 Lemon Juice
2-3 Green Chillies
1 Inch Piece Ginger
2 Cups Fresh Coriander Leaves
1/4 – 1/2 Cup Water
Salt to taste

Steps to Make Green Coriander Chutney: 

  1. In a grinding jar, start by adding peanuts onion and green chillies & blend them for 20-30 seconds.
  2.  Once grinded coarsely, add the fresh coriander leaves which is cleaned & washed properly. 
  3. Add seasoning (salt) to this mixture, followed by ginger pieces & lemon juice.  
  4. Finally some water to make smooth paste. Depending upon the quality of coriander & your grinder the water amount required will vary. Start by adding ¼ cup and add more water gradually as needed. 
  5. Grind this to a smooth paste and your Chutney is ready. 
  6. Store it in fridge, it easily lasts for a week.

Important Pointers:

  • You can increase the quantity of green chillies depending on the type your are using and how spicy you you’re Chutney to be. 
  • Ginger gives a nice fresh flavour to the Chutney.
  • Lemon juice helps in maintaining the vibrant green color of the chutney.
  • Coriander or cilantro is a wonderful source of dietary fiber, manganese, iron and magnesium as well. In addition, coriander leaves are rich in Vitamin C, Vitamin K and protein. They also contain small amounts of calcium, phosphorous, potassium, thiamin, niacin and carotene.
  • Coriander lowers bad cholesterol. It is very good for digestive system & good for diabetes patients as it lowers the sugar levels.

If you want to see how I made this Green Coriander Chutney, then head over to video recipe by clicking this link:


Click “Print” or “PDF” button below to save this recipe!

Homemade Rice Chips Recipe: Tea Time Munching Snack!

Homemade Rice Chips Recipe: Tea Time Munching Snack!

Homemade Rice Chips Recipe: Tea Time Munching Snack!


As a child, I always used to see my mom making chips of various kinds during summers & I used to lend her a helping hand. Face it, making chips from 20 kgs of potatoes wasn’t an easy thing. There was series of tasks involved – peeling, slicing, blanching, drying under the sun for many days. As a child it all seemed fun but when I grew up all this work seemed tedious and I told myself, “I will never make chips at home!” But on the contrary, here I am making/sharing Rice Chips Recipe. When I learnt about this recipe from a relative, I was intrigued to try. It is such an easy recipe with fewer ingredients; I knew I had to make this. I am so glad I made it all by myself and it turned out really really good, despite being my first attempt. I am already thinking of ways to innovate this recipe and create different variations. But more on that later.


Homemade Rice Chips Recipe: Tea Time Munching Snack!

Click “Print” or “PDF” button below to save this recipe!

You will need:

1 Cup Small Grain Rice
2.5 Cups Water
1 Tsp Cumin Seeds
1 Tsp Sesame Seeds
2 Tsp Green Chillies Paste
Oil for deep frying
Chat Masala for sprinkling/garnish
Salt to taste

Homemade Rice Chips Recipe: Tea Time Munching Snack!
The Mould

Steps to Make Rice Chips At Home:  

  1. First & foremost, wash & soak rice atleast for 8 hours, I prefer soaking it overnight.
  2. Next, in a pressure cooker, add all the ingredients – rice, water, green chillies paste, cumin & sesame seeds & pressure cook for 3 -4 whistles. 
Homemade Rice Chips Recipe: Tea Time Munching Snack!
Cooked Mixture

 3. Once the pressure cools down, allow it come to room temperature. 
4. Assemble the ‘Sev/Chakri Mould’, use the Chakri making plate. 
5. Fill up the mould with the rice mixture, screw the lid and make chips on a cloth. Do not worry about the shape& size. 

Homemade Rice Chips Recipe: Tea Time Munching Snack!
Filling the Mould with mixture

6.  Once you are done, it should look like this.

Homemade Rice Chips Recipe: Tea Time Munching Snack!
Chips drying on cloth under the sun

7. You should do the process of making chips on the cloth under the sun itself – on a terrace or a balcony. 
8. Allow it dry under the sun for a day. 
9. If you feel there is still some moisture content in the chips, then keep it under the sun for another day. My chips took 2 days to completely dry. 

Homemade Rice Chips Recipe: Tea Time Munching Snack!
After 2 days under the sun!

10. Once these chips are sun-dried, store it away in an air-tight container & fry as needed. It can be stored for months. 

Homemade Rice Chips Recipe: Tea Time Munching Snack!
Dried Rice Chips

11. Fry the chips & sprinkle some chat masala after frying. Munch on it anytime!

Homemade Rice Chips Recipe: Tea Time Munching Snack!
Mouth watering chips ready to eat 🙂

Important Pointers:

  • I am using small grain rice because it is economical when you plan to make large quantities. If you do not have small grain use the long grain rice (basmati).
  • What we are looking for is lumpy consistency of cooked rice, if you feel the rice seems separated after cooking, add in more water and cook it for another 1-2 whistles. You can never overdo the rice for this recipe. 
  • Please do not make the chips on tissue or paper, in my experience it sticks badly and doesn’t come off after drying.

If you want to see how I made this Rice Chips, then head over to video recipe by clicking this link:


Food Trivia: Homemade Rice Chips are better alternative to those packet chips you get in the market. With all those preservatives, spices etc they use to make it, these Rice Chips are a much healthier options.

Cheat Tricks: If you do not want to pile on calories by deep frying it, cook them in microwave – on high power for about 20-30 seconds. It tastes yummy too!

P.S – If you have never used the ‘Sev Mould’ before it can pain you while using it, use a muscular helping hand like your husband 😉

Click “Print” or “PDF” button below if you want to save this recipe!

Penne Pasta Tossed in Spinach Gravy: Quick & Healthy Pasta Recipe

Penne Pasta Tossed in Spinach Gravy: Quick & Healthy Pasta Recipe

Penne Pasta Tossed in Spinach Gravy: Quick & Healthy Pasta Recipe


Pasta recipes are so frequent in my home, we love it!  Whenever we get those uncalled hunger pangs especially in the evenings, I don’t prefer that 2- minutes ready to eat noodles packet, they might be delicious and easy to make but lets face it, it is full of empty calories, zero nutrition. Spinach Pasta Recipe that I am sharing is so easy to make, super delicious & has nutritional value.

I like experimenting with different pasta shapes, my recipe says Penne Pasta but you can use any form of pasta that’s available at your home. I have made this recipe using Spiral & Macroni Pasta as well, it turned out equally tasty. 


Penne Pasta Tossed in Spinach Gravy: Quick & Healthy Pasta Recipe


Click “Print” or “PDF” button below to save this recipe!

You will need:


·         2 Tbsp Olive Oil
·         1 Cup Blanched Spinach Puree
·         1 Tsp Black Pepper Powder
·         1 Tsp Chilli Flakes
·         1 Tsp Oregano
·         2 Tbsp Fresh Cream
·         1.5 Cup Boiled Penne Pasta (1 Cup Raw Penne Pasta)
·         2 Tsp Grated Processed Cheese
·         Salt to taste

Serving: 2 persons


Steps to Make Penne Pasta Tossed in Spinach Gravy: 


  1. Begin by heating oil in a pan, if you don’t have Olive Oil, you can use regular cooking oil as well. During the whole process keep the burner flame on low/medium setting.
  2. Proceed by adding the spinach puree. Since it is already cooked, sauté it for about 2 minutes. 
  3. Season the spinach puree with salt, black pepper powder (freshly grounded tastes amazing!) chilli flakes & oregano. Give a quick stir and allow the tastes of spices merge into puree for a minute or so.
  4. Now to make the pasta creamy, add in the cream, you can use ‘ghar ki malai’ or a store bought cream packet. I always prefer the homemade version. Cream will add texture to the gravy which is much needed in a pasta dish. 
  5. Follow it by adding boiled Penne Pasta. Give it a quick mix and stir fry on high flame for another 1-2 minutes and pasta is ready. 
  6. Serve in a plate and sprinkle some cheese over it for garnish. This recipe doesn’t really need much to garnish, the vibrant green spinach is enough to make it appealing to the eyes & appetite!

Important Pointers:

  •  Even though this recipe is already packed with nutrients but if you are on diet then you can altogether skip the cheese. In case you want to make your pasta creamier then add about 2 Tbsp Cheese along with Cream while making it.
  • You can even boil the pasta in a batch and store away a portion in an air tight container in refrigerator for next use, but make sure you consume it within 2-3 days of storing. 
  • Use pasta which is made of part Semolina & part flour or even better use a Whole Wheat Pasta, this will knock down good amount of calories.
  • For quick blanching of spinach & boiling of pasta, first blanch spinach for 1-2 minute in boiling water and keep aside, then in the same water, boil your pasta for 8-10 minutes or as instructed on the packet.  I like my pasta to be slightly overdone, I boil it for about 12-15 minutes.
Food Trivia: Did you know spinach is low in calories and is an excellent source of vitamin K, vitamin A, magnesium, folate, manganese, iron, calcium, vitamin C, vitamin B2, potassium, vitamin B6!

If you want to see how I made this Quick Spinach Penne Pasta, then head over to video recipe by clicking this link:

Click “Print” or “PDF” button below if you want to save this recipe!